CallerReady Core Activities – Administrator
Accessing your Administrator Account
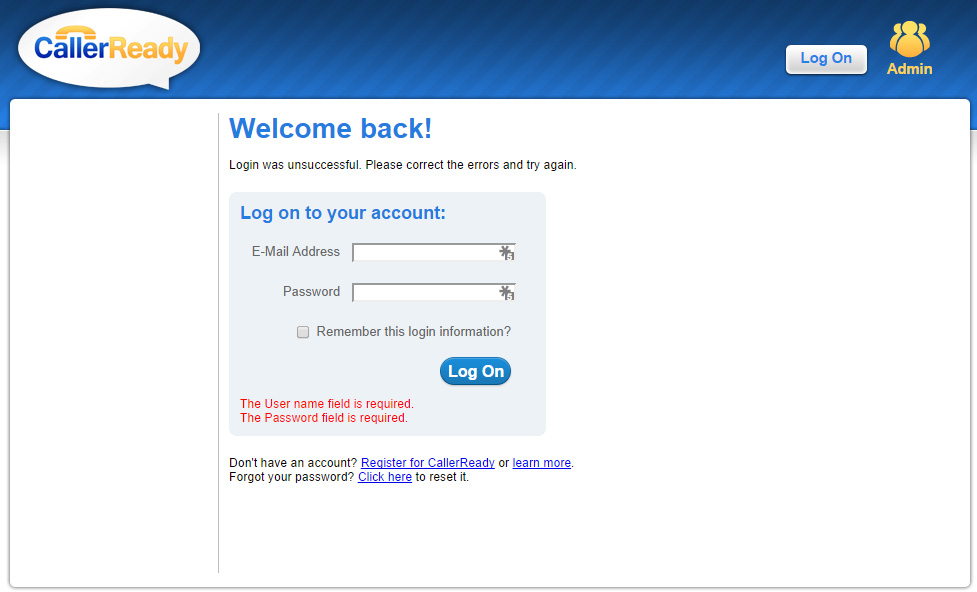
URL: http://app.callerready.com
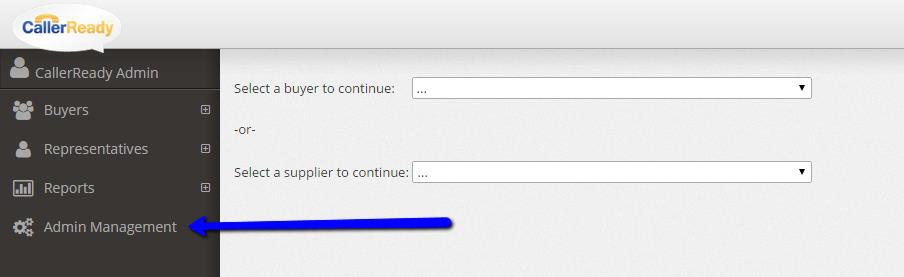
Access Admininstration portal by clicking the ‘Admin Management’ Link (see below)
Adding a New Representative
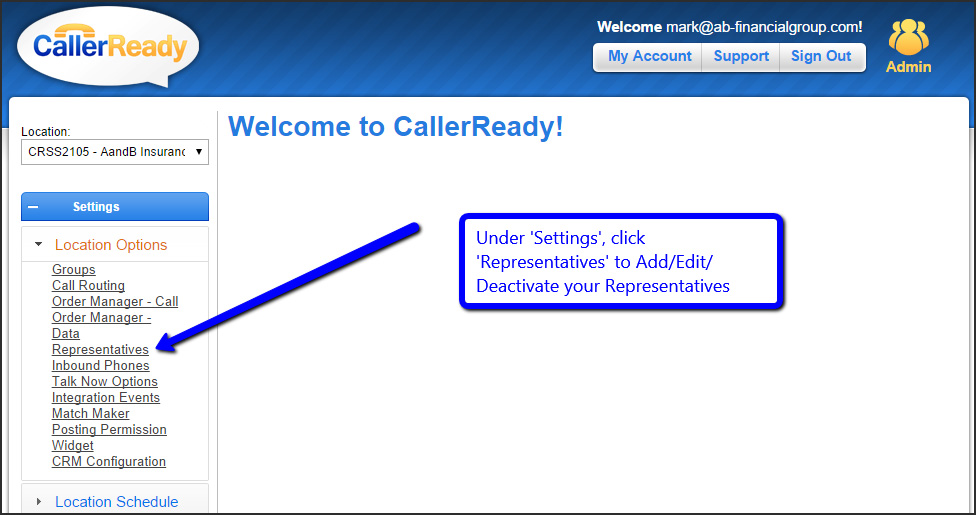
Under ‘Location Options’, click ‘Representatives’
Click ‘+Add New Representative’ to add a new rep and complete form

Add New Representative Details
- First Name
- Last Name
- Email Address (must be unique across your account)
- Type of Phone (Home, Work, Mobile, CallerReady Phone, Other)
- Phone Number
- Weight (1-99, 99 having the most weight and will be given priority)
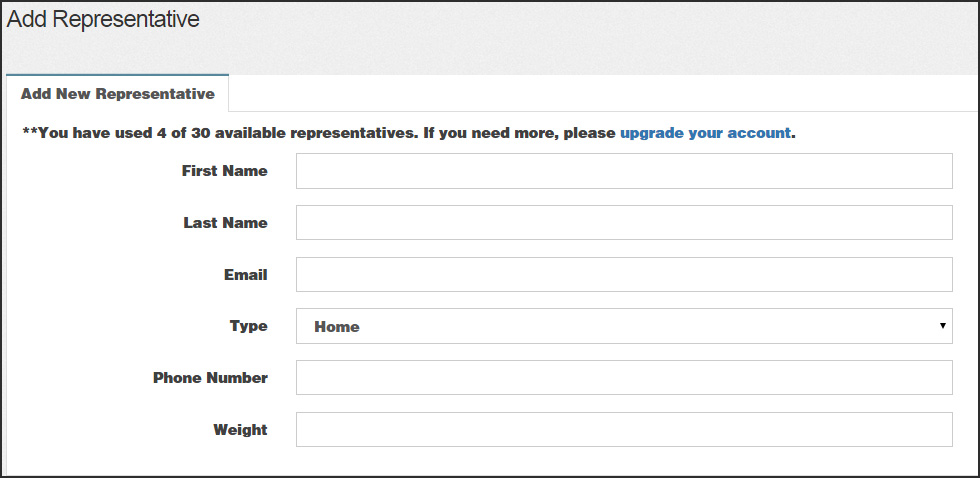
To save, click ‘Add Representative’ in upper right-hand corner to save and complete.
Managing Your Representatives- Representative Manager
Access the ‘Representative Manager’ by clicking ‘Representatives’ from ‘Location Manager’ dropdown.
You can select the reps to view by location from the dropdown in the upper left corner.
Representative Status Tabs
- Available – Reps that are enabled to make/receive calls
- Unavailable – Reps that are not ineligible to make/reeve calls
- Deleted – Reps that are no longer with your organization
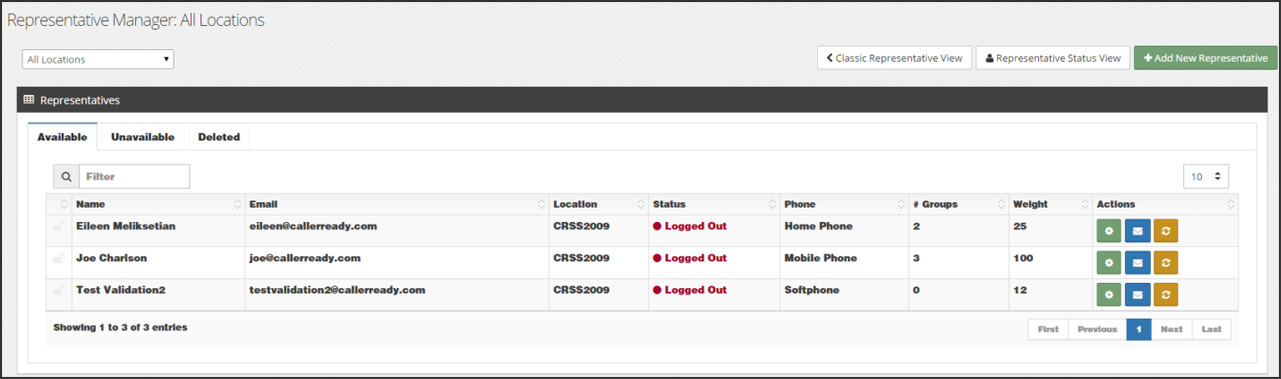
This view also shows the rep’s status along with the phone number (or Softphone) they’re using as well as the number of call groups they’re associated with and call weighting.
Edit a Representative
To edit a representative, click the green gear icon. ![]()
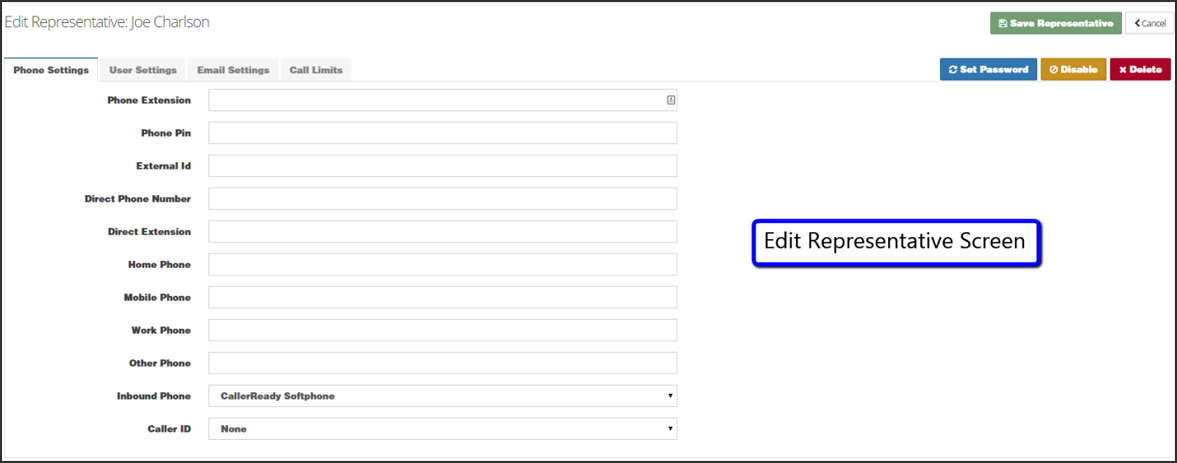
Edit a Representative (continued)
This view contains 4 tabs:
- Phone Settings – Add/edit representative’s phone number, inbound phone and caller ID
- User Settings
- Contact Status – Change the rep’s call status
- User Timezone – Set the appropriate time zone for the rep
- Email Settings – Configure the email settings for a rep
- Call limits – Establish call limits for your reps
Remember to save your settings by clicking on the ‘Save Representative’ button.
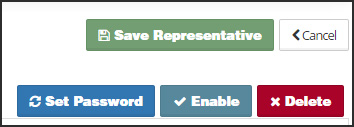
Deactivating a Representative
To deactivate a representative, select the green gear icon associated with the representative and click ‘Disable’ button in the upper right corner.
Resetting a Representative’s Password
Reset a rep’s password by clicking the ‘Set Password’ button. Reset password is always, ‘testing123’.
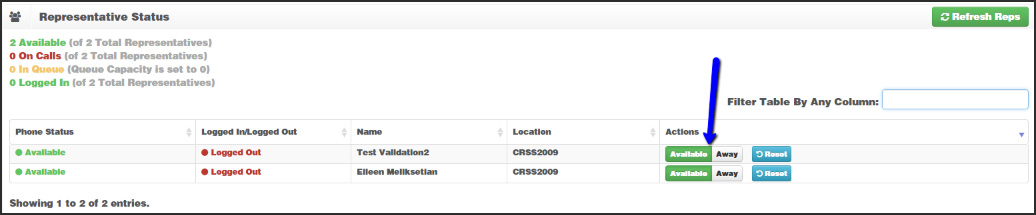
Changing Representative Status – Online/Away
To check and modify a representative’s status, click the ‘View Representative’s Status’ button in the Representatives view page.

This view always you to check their phone status and set the representative as either ‘Available’ or ‘Away’.
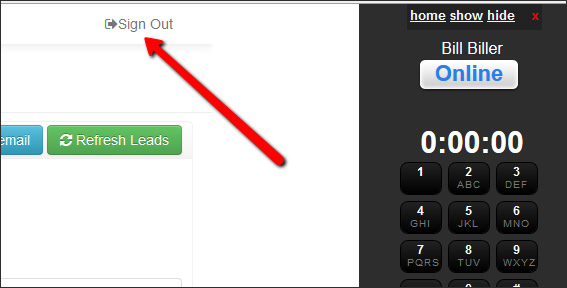
4. Changing Representative Status – Sign Out
At the end of the day, all representatives should sign out and close their browser to ensure that phone calls will be routed to available representatives. Have the representative click the ‘Sign Out’ button that appears in the upper right hand corner of the representative’s lead management portal and close their browser.
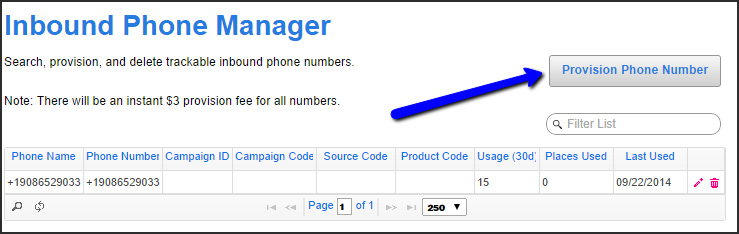
Provisioning New Phone Numbers
To provision a new phone number, log into your account and navigate to Settings/Location Options/Inbound Phones and click, ‘Provision Phone Number’ in the upper right hand corner.